 Part 1: A fistful of advice on
getting the best out of Native Instruments' powerful modular soft-synth.
Part 1: A fistful of advice on
getting the best out of Native Instruments' powerful modular soft-synth.
Part 1: A fistful of advice on
getting the best out of Native Instruments' powerful modular soft-synth.
part 2
Len Sasso
In this two-part workshop, I'll be presenting a number of tips and tricks to help you get the most out of the latest incarnation of Native Instruments' Reaktor. In part one, we'll concentrate on the operational side of Reaktor, with tips on setting up and using its instrument Panels and toolbar features. In part two, we'll take a closer look at Ensemble design with tips on how to choose and use Reaktor's various Modules.
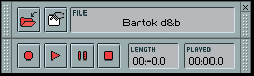
The Ins & Outs Of Audio Recording & Playback
Reaktor
provides two ways to play and record audio files -- essential features
when using it as a stand-alone application. The built-in recorder and
player stream audio to and from your hard drive whereas the Tape Deck
Modules will record and play audio from your hard drive or RAM. The
Tape Deck Modules offer a great deal more flexibility (control of
playback position, output processing, and
the ability to use several Tape Decks, for example), but the built-ins
do the basic job without requiring any wiring.
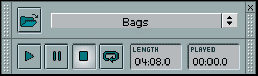
The important thing to remember about the built-in recorder is that you need to create and name the destination audio file before recording to it. Also keep in mind the recorder's start/stop options, which include triggering from MIDI Note On/Off messages and MIDI Clock, and loop counting. The important thing about the player is that its audio output shows up at Reaktor's first two external inputs, so these must be wired in order to hear the player.
Scope & Context
In
my Ensembles I always include an Instrument that contains a stereo
oscilloscope with level meters and a two-channel stereo mixer for
mixing live input with the Ensemble's output. That
allows
me to tweak the Ensemble in the context of either live input or a sound
file (usually a looped dub from a song I'm working on) played on the
built-in audio player. The scope can be a great aid when you're
building Ensembles, but it is unnecessary 'eye candy' when you're
actually using them. Therefore, I suppress its display in the Ensemble
Panel, so that it only takes up screen space when the Instrument Panel
is open. I also include on/off switches for the oscilloscope and each
stereo mixer channel in order to minimise CPU load when they're not in
use.
Building a simple mixer, or for that
matter a basic oscilloscope, is not a difficult Reaktor
project, but there's no need to reinvent the wheel. Reaktor's
factory library includes a number of mixer Macros and
Mixer
(2 Stereo In) is ideal for this job. The factory library also contains
several oscilloscopes, but my favourite, for its simplicity, is the
Autoscope Instrument contained in the on-line user library on the
Native Instruments web site. Autoscope automates the level adjustment,
requiring you only to set the scope's timing.
A Brief History Lesson...
A lot has changed
since Native Instruments first introduced Generator in 1996.
Here's a brief history of Reaktor's development, courtesy of
Jake Mandell of Native Instruments.
![]() 1996: Generator 0.96 -- modular synthesizer for the
PC requiring a proprietary audio card for low-latency operation.
1996: Generator 0.96 -- modular synthesizer for the
PC requiring a proprietary audio card for low-latency operation. ![]() 1998: Generator 1.5 -- total redesign featuring
hierarchical structures and support for any standard Windows soundcard.
Reviewed in SOS September 1998.
1998: Generator 1.5 -- total redesign featuring
hierarchical structures and support for any standard Windows soundcard.
Reviewed in SOS September 1998.![]() 1999: Generator/Transformator/Reaktor
2.0 -- adds granular sampling, real-time display of envelopes and
filters, and support for the Macintosh. Reviewed in SOS October
1999.
1999: Generator/Transformator/Reaktor
2.0 -- adds granular sampling, real-time display of envelopes and
filters, and support for the Macintosh. Reviewed in SOS October
1999.![]() 2000: Reaktor 2.3 -- introduces the Premium Library
and plug-in support for VST, VSTi, DirectConnect, MOTU, and DirectX
formats
2000: Reaktor 2.3 -- introduces the Premium Library
and plug-in support for VST, VSTi, DirectConnect, MOTU, and DirectX
formats![]() 2001: Reaktor
3.0 -- redesigned audio engine, new graphic design, event and audio
tables, XY control, new synthesis and sampling Modules. Reviewed in SOS
January 2002.
2001: Reaktor
3.0 -- redesigned audio engine, new graphic design, event and audio
tables, XY control, new synthesis and sampling Modules. Reviewed in SOS
January 2002.![]() 2002: Reaktor 3.5 -- improved sample handling,
improved VST performance, integrated browser, total cross-platform
compatibility.
2002: Reaktor 3.5 -- improved sample handling,
improved VST performance, integrated browser, total cross-platform
compatibility.
To build the mixer/scope Instrument from these parts, first import an empty Instrument. I suggest using the factory In2out2 Instrument, which has stereo inputs and outputs, and duplicating its two inputs so that you have four inputs and two outputs. In the Instrument Structure, import the mixer Macro and wire the four Instrument inputs to the four mixer Macro inputs. Also wire the mixer Macro's two outputs to the Instrument's outputs.
Next import the Autoscope Instrument. Note that you now have an Instrument within another Instrument. That can be useful, but in this case it is not what we want. The solution is to copy the contents of the Autoscope Instrument, and then to create an empty Macro to paste them into. Since we want a stereo scope, paste the contents in again and move the newly pasted objects, while they're still selected, so that they don't overlap other objects.
Since
you copied the scope twice, you will have two sets of controls, which
is not really convenient. Delete one Freeze button and one Time knob,
and wire the remaining ones to control both scopes. Repl ace
the two on/off switches by a single 2x2 Audio Switch Module, and
replace the two AC switches by Audio Relay Modules controlled by a
single Button Module.
ace
the two on/off switches by a single 2x2 Audio Switch Module, and
replace the two AC switches by Audio Relay Modules controlled by a
single Button Module.
I suggest wiring the outputs of the mixer to the inputs of the scope, but you could alternatively wire either pair of inputs to the scope, or even create a separate pair of inputs for it. To use the mixer/scope Instrument, wire Reaktor's top two audio inputs to one pair of its inputs and wire the output of whatever Instrument you're working on to the other. Wire the mixer/scope's output to Reaktor's audio outputs and you're done. You may want to then save this configuration as your default Ensemble, so that it's there to hand whenever you start building an Instrument from scratch.
Use
a 12-by-12 table to map the 12 pitch classes to the allowed notes
within a scale, then add the octave (the Div output times 12) to the
mapped value. The table shown in the screenshot maps notes to the C
Major scale by mapping sharps down a semitone. You could, instead, map
flats up a semitone, and the method you choose will depend on the
musical context. If
you subtract an offset from all incoming notes and add the same offset
back at the end, you can accomplish any scale correction you need with
just two tables -- one to round sharps down and one to round flats up
-- for all scales of the same type (all diatonic major scales, for
instance). Keep in mind that you can use a multi-row table to hold
different scale mappings.
Restricting Notes To A Scale
When
using a Table Module to map MIDI Notes to a specific scale, you'll save
a lot of setup time by using a Modulo Module to separate a note's pitch
class from its octave. The Modulo Module divides the A input by the B
input and gives the integer and remainder values at its Mod and Div
outputs respectively. Dividing by 12 (wire a constant with value 12 to
the B input) causes the remainder to range from zero (for every 'C') to
11 (for every 'B'). The integer part then indicates the octave.
Control Panel Tips
The
design of your Instrument and Ensemble Panels has a great deal to do
with their usability. A Control Panel with tiny, cryptically named
controls all crammed together will eventually find its way into most
people's trash. The first tip is to fill in the Info field in the
Properties for every Panel element, Instrument and Macro, no matter ho w
obvious their functions may seem -- it doesn't take long to forget the
obvious! This information will show up under the cursor whenever you
have Reaktor's hints feature turned on, and that will be a
great help to you once you've forgotten how it works, as well as making
things easier for new users of the Ensemble.
w
obvious their functions may seem -- it doesn't take long to forget the
obvious! This information will show up under the cursor whenever you
have Reaktor's hints feature turned on, and that will be a
great help to you once you've forgotten how it works, as well as making
things easier for new users of the Ensemble.
One way to fit more controls into a given space is to suppress knob, slider, and meter graphics, and to display only their values. Each Panel element's graphic and value displays can be toggled on or off in the Properties.
Reaktor's
new Audio and Event Table Modules have all kinds of applications beyond
building your own wave tables and step sequencers. One of my favourites
is to use an audio table as a controller map. (I use an Audio Table,
rather than an Event Table, because it doesn't require you to retrigger
its output with each position chang
e.)
Use the incoming values from an on-screen or MIDI controller to choose
the read position (RX), and use the table values for the desired
output. This trick can be equally well applied to note pitches and
velocities -- for instance, to keep notes within a particular scale or
to create a nonlinear velocity curve. Use a multi-row table if you want
to switch between maps, and if you're making a 'set and forget' map,
save screen space by suppressing the table's graphic display after
you've entered the table values.
This Or That? The Compare Function
Reaktor's
Compare function -- activated by the Compare button in the Instrument
toolbar -- can be a big time saver once you get used to how it works.
The Compare button toggles all controls for the selected Instrument
between the current Panel settings and the settings held in a 'compare
buffer'. The tricky thing to keep in mind is that the compare buffer
gets captured automatically when you change any control setting after
pressing the Compare button. In short, you can go on from either of the
comparison states -- the buffer settings or the current settings -- by
simply changing something on the Control Panel. To reset the compare
buffer, simply click the Compare button twice, then continue tweaking
your patch. That is useful, for example, when you want to modify a
Snapshot because it is faster and more convenient than overwriting the
Snapshot memory.
If you haven't built something with it yet, you may not have realised that Reaktor's other new graphic controller, the XY Control Module, is both a display and a control. Furthermore, the two functions are completely independent. When you move the cursor with the mouse, its position is reflected in the MX and MY outputs, but changes at any of the four inputs have no effect on the outputs. In short, six control values are displayed: the mouse X and Y position (white) and the coordinates -- X1, Y1, X2, and Y2 -- of the corners of a rectangle (blue).
You can get the mouse into the display action by using the MX and MY outputs for the X1 and Y1 inputs. You can't wire the outputs directly to the inputs, but you can do so via intermediate objects. Event Add Modules make a good choice for that job. The mouse now controls one corner of the rectangle and whatever you wire to the X2 and Y2 inputs controls the opposite corner. You could use the mouse outputs to set the cutoff frequencies of low- and high-pass filters in series and use X2 and Y2 to display the outputs of filter cutoff envelopes. As another example, you could use the mouse to control volume and pan while using X2 and Y2 to display the output of a volume envelope and a pan LFO.
It's A Snap
Even for the
experienced synth programmer, Reaktor's hierarchical approach
to Snapshot management can at first be confusing. Here are some things
to remember:
![]() As with the Compare function, Reaktor saves and
recalls Snapshots on a per-Instrument basis.
As with the Compare function, Reaktor saves and
recalls Snapshots on a per-Instrument basis.![]() You can control whether an Instrument's settings are saved
and recalled
along with Shapshots of the Ensemble or any other Instrument that
contains it. There are separate settings for Store By Parent and Recall
By Parent in the Instrument's Properties.
You can control whether an Instrument's settings are saved
and recalled
along with Shapshots of the Ensemble or any other Instrument that
contains it. There are separate settings for Store By Parent and Recall
By Parent in the Instrument's Properties.![]() When an Instrument Snapshot is saved automatically with its
parent's, a
new Instrument Snapshot is created even if the parent's Snapshot is
being overwritten.
When an Instrument Snapshot is saved automatically with its
parent's, a
new Instrument Snapshot is created even if the parent's Snapshot is
being overwritten.![]() When the Snapshot dialogue is open, selecting Snapshots from
the menu
does not affect the Panel. That allows you to overwrite any Snapshot
with the current Panel settings.
When the Snapshot dialogue is open, selecting Snapshots from
the menu
does not affect the Panel. That allows you to overwrite any Snapshot
with the current Panel settings.![]() To rename a Snapshot open the Snapshot dialogue, select the
Snapshot to
be renamed, type in a new name in the Label window, and click the Store
button.
To rename a Snapshot open the Snapshot dialogue, select the
Snapshot to
be renamed, type in a new name in the Label window, and click the Store
button.![]() To delete a Snapshot open the Snapshot dialogue, select the
Snapshot to
be deleted, and click the Delete button. If you have a keyboard macro
utility, such as Quickeys on the Macintosh, you can save a lot
of time by setting up a looping macro to delete multiple Snapshots.
To delete a Snapshot open the Snapshot dialogue, select the
Snapshot to
be deleted, and click the Delete button. If you have a keyboard macro
utility, such as Quickeys on the Macintosh, you can save a lot
of time by setting up a looping macro to delete multiple Snapshots.
Going Remote
Reaktor's
MIDI Learn function makes it easy to set up MIDI control for any Panel
element. But, you can get a lot more out of this feature than simply
assigning a MIDI Continuous Controller to Control Panel knobs
The
number of notes that have passed since the last Master Clock reset (ie.
since the last Rewind To Start) appears at the Modulo Module's Div
output. You can use a Meter Module with its value display turned on to
see the count. You could also use the output to trigger an amplitude
envelope for an oscillator in order to have an audible metronome. To
count bars and beats, wire the Div output of the Modulo Module to the A
input of another Modulo Module, and wire a constant equal to the number
of beats per measure to the second Modulo Module's B input. The current
measure will now appear at the new Modulo Module's Div output, and the
beat number within the bar will appear at its Mod output.
and sliders.
The MIDI File Player
Reaktor's
inbuilt MIDI file player has three operations: Play, Stop, and Rewind
To Start. There's no way to gain control of the playback position, but
you can at least build a little Macro to display it. Use a SongPos
Module wired to a Modulo Module's A input with a Constant Module wired
to the B input. Set the Constant Module to the number of pulses in the
note value you want to count. For quarter notes, set the value to 24 --
Reaktor uses a 24ppqn clock.
Reaktor controls are not limited to the MIDI data value range of 0 to 127, so they automatically adjust the MIDI input to cover their full data range. When that is not what you want, use a Controller In Module instead of a direct assignment. The Controller In Module lets you specify the ranges of data received and transmitted using its Properties. If you want the incoming MIDI data to automate a Panel control (rather than to directly control some parameter), wire the Controller In Module into a Controller Out Module, and turn on Internal MIDI Routing in the Instrument's Properties. Be sure the Controller In and Out Modules have different MIDI Controller numbers (to avoid a MIDI feedback loop), and set the Panel control's MIDI Controller number to match the Controller Out Module's.
MIDI control in Reaktor is a two-way street. If you turn a control's Panel To MIDI property on, moving it will send MIDI Controller data to Reaktor's MIDI output for controlling external MIDI devices or other software. As above, you can use Controller Out Modules to give you more control over the data ranges.
Finally,
if you turn on Internal MIDI Routing in an Instrument's Properties, you
can link different Control Panel elements as well as set up control
processing. Examples include randomising values, creating solo buttons
(turning one on turns the others off), and grouping sets of parameters.
For an example of control randomisation at work, have a look at the
NewsCool Ensemble in the Reaktor 3 factory library. ![]()